
Desserts
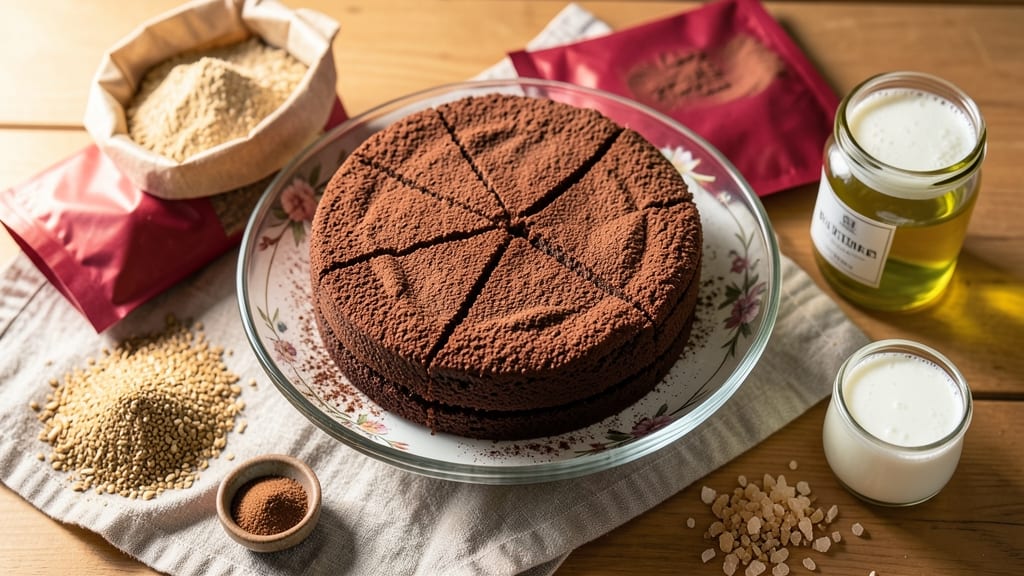
This atta chocolate cake recipe delivers a perfect balance of rich cocoa and earthy whole wheat—moist enough to melt in your mouth while keeping that satisfying texture we all love.
The secret lies in the combination of whole wheat flour (atta) and cocoa powder, which creates a tender crumb with subtle spice notes that elevate every slice. I've perfected this recipe over years of baking, ensuring it stays tender without turning dense, even when baked at home.
The beauty of this cake is its versatility—it works equally well as a weekend treat or a festive dessert, thanks to its balanced sweetness and deep chocolate flavor.
Unlike traditional chocolate cakes that can dry out, this version stays moist for days when stored properly, making it ideal for meal prep or special occasions. The addition of warm spices like cardamom or cinnamon (optional) adds an extra layer of complexity that pairs beautifully with the cocoa.
What sets this recipe apart is the foolproof method for achieving that signature fluffy yet sturdy texture, even with whole wheat flour. We'll use a combination of baking powder and buttermilk to ensure a light rise, while a simple glaze (optional) adds a glossy finish that makes it look—and taste—restaurant-worthy.
The result? A cake that's rich, satisfying, and just sweet enough to please both chocolate lovers and those who prefer a subtler dessert.
Whether you're baking for a celebration or simply craving a decadent yet wholesome treat, this recipe delivers. The instructions are straightforward, and the ingredients are easy to find, making it perfect for bakers of all skill levels. Let’s get started—your taste buds will thank you.
Ingredients for atta chocolate cake
Pantry staples meet specialty flours for a cake that balances earthy atta and rich cocoa perfectly.
| Ingredient | Amount | Notes |
|---|---|---|
| Whole Wheat Flour (atta) 🌾 | 2 ½ cups | Lightly sifted, protein content 12-14% |
| Unsweetened Cocoa Powder 🍫 | ¾ cup | Dutch-processed for smoother flavor |
| Granulated Sugar 🍚 | 1 ½ cups | Superfine for finer texture (or blend regular) |
| Light Brown Sugar 🍚 | ½ cup | Packed firmly for moisture |
| Buttermilk 🥛 | 1 cup | Homemade or store-bought, room temp |
| Extra-Virgin Olive Oil 🫒 | ½ cup | Light flavor, not strong olive taste |
| Pure Vanilla Extract 🌿 | 2 tsp | High-quality, no imitation |
| Baking Powder 🧂 | 2 tsp | Aluminum-free for best rise |
| Baking Soda 🧂 | ½ tsp | Freshly opened for potency |
| Salt 🧂 | ½ tsp | Fine sea salt preferred |
| Ground Cardamom 🌿 | ½ tsp | Optional, toasted for aroma |
| Ground Cinnamon 🌿 | ¼ tsp | Optional, warm spice pairing |
| Large Eggs 🥚 | 2 whole | Room temperature for even mixing |
| Powdered Sugar (for glaze) 🍚 | 1 cup | Optional, sifted for smooth finish |
| Milk (for glaze) 🥛 | 2 tbsp | Whole milk for creaminess |
The atta flour is non-negotiable here—Bob's Red Mill or King Arthur brands deliver the best texture. If your local store doesn't carry atta, substitute half with whole wheat pastry flour for a lighter crumb. For cocoa powder, Valrhona or Hershey's Special Dark elevate the flavor profile significantly. The brown sugar should be packed firmly to maximize moisture retention, while the granulated sugar should be superfine for a finer texture. If you don't have superfine, simply blend regular granulated sugar in a blender for 30 seconds.
No buttermilk? Mix 1 tablespoon lemon juice or vinegar with 1 cup milk—let it sit for 5 minutes to curdle. The olive oil adds moisture without overpowering the chocolate flavor, but if you prefer butter, use 0.25 cup melted butter plus 0.25 cup vegetable oil to maintain the same moisture level. For the glaze, powdered sugar should be sifted to avoid lumps, and whole milk creates a richer finish than skim. The cardamom and cinnamon are optional but recommended—they add that subtle spice complexity mentioned in the introduction that makes this cake truly special.
Store the cake in an airtight container at room temperature for up to 4 days, or refrigerate for 1 week if using the glaze. The glaze keeps the cake moist longer, so if you're making it ahead, add the glaze just before serving. For maximum freshness, bake and serve immediately, but the flavor actually improves after 24 hours as the spices mellow. Freeze unglazed portions for up to 3 months—thaw at room temperature before glazing.
Why You'll Love This Recipe
- No-Fuss Mixing: I swear by this batter—just fold the atta and cocoa together, add buttermilk, and stir. No eggs, no butter, no fuss. The whole process takes less time than waiting for the oven to preheat.
- Rich Without Guilt: That combo of brown sugar and cocoa? Pure indulgence, but the atta keeps it from being too heavy. It’s the kind of cake that tastes like a treat but won’t leave you sluggish afterward.
- Birthday or Breakfast: Slice it warm for a celebration or pack it in lunchboxes the next day. Honestly, I’ve served it at potlucks, packed it for work, and even eaten it straight from the pan—no judgment here.
- Budget-Friendly Staples: You’re already using pantry basics: atta, sugar, cocoa. The buttermilk adds richness without breaking the bank. Leftovers? They disappear fast—trust me, I’ve tested this.
Step-by-step instructions for atta chocolate cake
This method delivers a tender, moist crumb with rich cocoa depth and subtle spice complexity.
Combine Dry Ingredients with Precision
In a large mixing bowl, sift together the 2.5 cups whole wheat flour (atta) with 0.75 cup unsweetened cocoa powder, 2 tsp baking powder, 0.5 tsp baking soda, 0.5 tsp salt, 0.5 tsp ground cardamom, and 0.25 tsp ground cinnamon. I use a fine-mesh sieve to eliminate any lumps and ensure even distribution of the spices throughout the batter.
Whisk the dry ingredients vigorously for 30 seconds until fully aerated. The cardamom and cinnamon should be evenly dispersed—this prevents pockets of concentrated spice that can overpower the chocolate flavor. Set the bowl aside while you prepare the wet ingredients.
Whisk Wet Ingredients to Perfect Consistency
In a separate bowl, combine the 1.5 cups granulated sugar and 0.5 cup light brown sugar with the 1 cup buttermilk, 0.5 cup extra-virgin olive oil, and 2 tsp pure vanilla extract. Whisk vigorously for 1-2 minutes until the sugars dissolve completely and the mixture becomes smooth and homogeneous.
The olive oil provides moisture while maintaining a tender crumb, and the buttermilk adds subtle tang that balances the sweetness. Add the 2 whole large eggs one at a time, whisking well after each addition to fully incorporate them into the mixture. The batter should be thick but pourable—if it's too stiff, add 1-2 tablespoons of milk to reach the ideal consistency.
Gently Fold Wet into Dry for Maximum Moisture
With the mixer on low speed, gradually add the wet mixture to the dry ingredients, mixing just until combined. Avoid overmixing—stop as soon as the batter comes together. The goal is to maintain air pockets for a light texture while ensuring even distribution of the cocoa and spices.
Here's the thing—this batter should be thick but not dry. If it appears too stiff, gently fold in 1-2 tablespoons of milk to maintain the proper consistency. The batter should coat the back of a spoon but still flow smoothly when poured. This ensures a moist crumb without making the cake dense.
Bake at Controlled Temperature for Even Rise
Preheat your oven to 350°F and grease two 8-inch round cake pans or one 9x13-inch baking pan with butter or baking spray. Divide the batter evenly between the pans and smooth the tops with a spatula. Bake for 30-35 minutes (or 40-45 minutes for the 9x13-inch pan) until a toothpick inserted into the center emerges clean.
I recommend checking for doneness at the 25-minute mark—the cake should spring back slightly when pressed gently in the center. If the edges brown too quickly, tent the pans with aluminum foil to prevent overbrowning while the center finishes cooking. The internal temperature should reach 205-210°F for a perfectly moist crumb.
Cool and Glaze for Professional Finish
Remove the cakes from the oven and let them cool in the pans for 10 minutes. Then transfer them to a wire rack to cool completely. While the cakes cool, prepare the glaze by whisking together 1 cup powdered sugar and 2 tbsp milk until smooth. The glaze should be thick enough to coat the back of a spoon but still drizzle easily.
Once the cakes are completely cool, spread the glaze evenly over the top. I like to let the glaze set for 15-20 minutes before slicing to ensure it doesn't smear. For a more polished look, dust the top with a pinch of cocoa powder or a sprinkle of toasted cardamom seeds. Serve at room temperature for the best texture and flavor.
Pro Tips For Making Atta Chocolate Cake
- Sift the Atta First: I learned this the hard way—atta’s dense and loves to clump. Sift it with the cocoa powder and baking powder before measuring, then whisk the dry mix in your bowl. This keeps the cake light instead of brick-like, and you’ll avoid the dreaded "soggy middle" that comes from uneven distribution.
- Warm the Buttermilk: Cold buttermilk makes the cake dense, and this recipe already has enough going on with the atta. Warm it slightly (just enough to feel lukewarm to the touch) before mixing—it blends better with the fats and helps the cocoa dissolve more evenly. Skip the microwave; a bowl of hot water for 2 minutes does the trick.
- Don’t Overmix the Batter: Attas a stubborn flour, and once you start folding in the buttermilk, it’s easy to get carried away. Mix just until the dry ingredients disappear—about 20 seconds after the last flour streak vanishes. Overmixing develops the gluten in atta, and your cake will turn out tough instead of tender. (Yes, even if you’re impatient like me.)
- Bake at 325°F, Not Hotter: I was skeptical until I tried it: this cake’s dense enough that a higher temp (350°F+) will burn the edges before the center sets. Stick to 325°F and bake it 5–10 minutes longer than the recipe says—atta cakes need that extra time to dry out fully. A toothpick with a few moist crumbs is fine; wait for it to come out clean.
Pro cooking tips for atta chocolate cake
Flour Sifting Secrets
Always sift your whole wheat flour (atta) and cocoa powder together before mixing—this prevents lumps and ensures even distribution of the spices. I use a fine-mesh sieve and tap it gently against the bowl to break up any stubborn clumps.
For extra fluffiness, whisk the dry ingredients for 30 seconds after sifting to aerate them before adding the wet mixture. This step is non-negotiable for a light, tender crumb. 🌾
Buttermilk Substitutes
If you don’t have buttermilk, make your own by mixing 1 tablespoon lemon juice or vinegar with 1 cup milk, then letting it sit for 5 minutes to curdle. For a richer flavor, use whole milk instead of skim.
The tanginess balances the sweetness and keeps the cake moist—don’t skip this step if you want that signature texture. Trust me, your cake will thank you. 🥛
Olive Oil Over Butter
Using extra-virgin olive oil instead of butter adds moisture without overpowering the chocolate flavor. If you prefer butter, replace 0.5 cup olive oil with 0.25 cup melted butter + 0.25 cup vegetable oil to maintain the same tender crumb.
The oil also helps prevent the cake from drying out too quickly, which is especially important with whole wheat flour. 🫒
Baking Powder vs. Baking Soda
This recipe uses both baking powder and baking soda for optimal rise and texture. The baking powder (2 tsp) provides lift, while the baking soda (0.5 tsp) enhances browning and tenderness.
Make sure both are freshly opened—old leavening agents lose potency and can leave your cake flat. For best results, measure them accurately using a spoon-and-level method. 🧂
Spice Toasting Trick
For deeper flavor, lightly toast the ground cardamom and ground cinnamon in a dry skillet over low heat for 30 seconds before adding them to the dry ingredients. This releases their aromatic oils, intensifying the warm spice notes in every bite.
If you’re short on time, just use freshly ground spices—they’ll still add that extra layer of complexity. 🌿
Glaze Consistency Tips
The glaze should be thick enough to coat the back of a spoon but still drizzle smoothly. If it’s too runny, add 1 teaspoon powdered sugar; if it’s too stiff, add 1 teaspoon milk.
Let the glaze set for 15-20 minutes before slicing to prevent a sticky mess. For a restaurant-worthy finish, dust the top with cocoa powder or toasted cardamom seeds right after glazing. ✨
Nutrition facts
Frequently asked questions
Can I make this cake without buttermilk?
Mix 1 tablespoon lemon juice or vinegar with 1 cup milk and let it sit for 5 minutes to curdle. For richer flavor, use whole milk instead of skim. This homemade buttermilk substitute works perfectly to maintain the cake's signature moisture and tang.
Why does my atta chocolate cake turn out dense?
Overmixing the batter is the most common cause. Mix just until combined—stop as soon as the ingredients come together. Also, make sure your baking powder and soda are fresh, and don't overfill the pans. Whole wheat flour absorbs more liquid, so if your batter seems too stiff, add 1-2 tablespoons of milk before baking.
Can I substitute whole wheat flour with all-purpose flour?
You can, but the texture will change. Replace half the atta with all-purpose flour to maintain some whole grain benefits while making the cake lighter. The earthy flavor will be less pronounced, but the cake will still be delicious. For best results, keep at least 1 cup of atta in the recipe to maintain that signature wholesome taste.
How do I store leftovers to keep them moist?
Store the cake in an airtight container at room temperature for up to 4 days. For longer storage, refrigerate for 1 week or freeze for 3 months. The glaze helps preserve moisture, so add it just before serving. If the cake dries out, briefly rewarm slices in the microwave with a damp paper towel for 5-10 seconds.