
Desserts
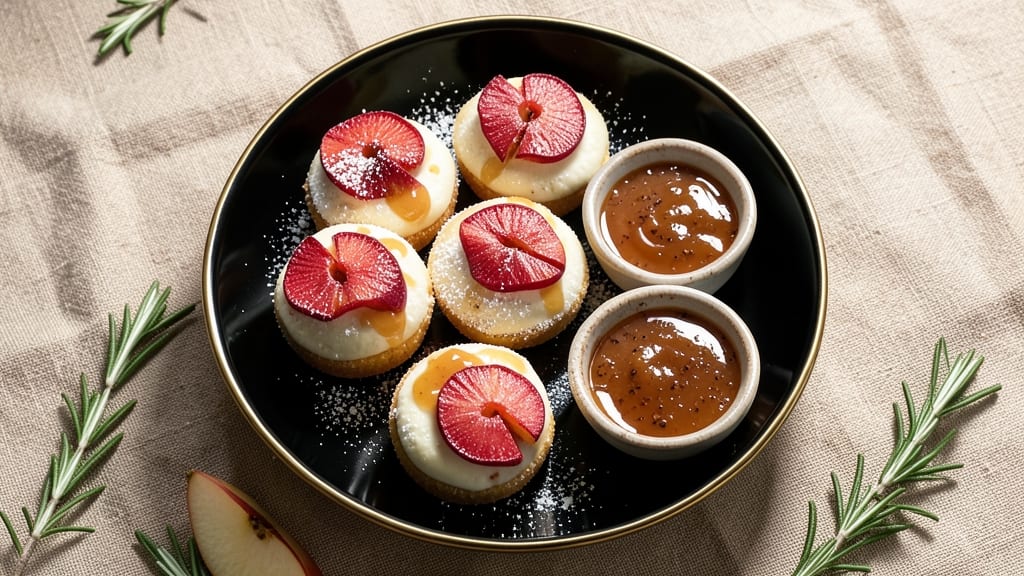
This apple cake pops recipe transforms classic apple cake into bite-sized treats with a caramelized apple filling that tastes like autumn in every bite. The secret lies in blending spiced cake batter with chunks of tender apple, creating pockets of sweet, spiced goodness that stay moist even after baking.
These mini desserts are perfect for parties, gifts, or satisfying that afternoon sweet tooth without the guilt.
The process starts with a simple cake batter infused with cinnamon and nutmeg, then folded with diced apples for natural moisture and flavor.
After baking, the cake is cooled, shaped into balls, and inserted with a dollop of caramelized apple filling—think of it as a mini apple pie in every bite.
The real magic happens when you dip them in melted chocolate or a glossy glaze, then decorate with crushed nuts or a drizzle of caramel.
What you’ll end up with is a tray of golden, bite-sized desserts that look as impressive as they taste—crispy on the outside, tender and spiced inside, with that perfect balance of sweet and tart.
They’re easy to customize (add white chocolate, sprinkles, or even a dusting of powdered sugar) and stay fresh for days when stored properly. These are the kind of treats that disappear faster than you can say "second helping."
Best of all, this recipe scales effortlessly—whether you’re making a dozen for a gathering or a batch for meal prep. The techniques are straightforward, and the results are consistently restaurant-quality. Let’s get baking!
Ingredients for apple cake pops
These 15 simple ingredients transform into magical mini apple treats that taste like autumn in every bite!
| Ingredient | Amount | Notes |
|---|---|---|
| All-Purpose Flour 🌾 | 2 ½ cups | Sifted for lighter texture |
| Granulated Sugar 🍚 | 1 ½ cups | White or light brown |
| Packed Brown Sugar 🍚 | ½ cup | For moistness and depth |
| Unsalted Butter 🧈 | 1 cup | Room temperature, full-fat |
| Large Eggs 🥚 | 2 whole | Room temperature |
| Vanilla Extract 🌿 | 2 tsp | Pure vanilla preferred |
| Ground Cinnamon 🌶️ | 2 tsp | Freshly ground for warmth |
| Ground Nutmeg 🌶️ | ½ tsp | Freshly grated preferred |
| Baking Powder 🧂 | 2 tsp | Aluminum-free recommended |
| Salt 🧂 | ½ tsp | Fine sea salt |
| Granny Smith Apples 🍎 | 3 medium | Peeled, diced small |
| Milk 🥛 | ½ cup | Whole milk preferred |
| Caramelized Apple Filling 🍎 | 1 ½ cups | Store-bought or homemade |
| White Chocolate Chips 🍫 | 1 cup | For dipping, high-quality |
| Crushed Pecans 🌰 | ½ cup | Toasted for extra flavor |
The apples are the star—Granny Smith for tartness, but Fuji or Honeycrisp work too. Grab them at Trader Joe's or your local farmers market when they're in season (fall, obviously). If you can't find fresh, canned apple pie filling in a pinch, but it won't be the same. For the caramelized filling, Trader Joe's caramel sauce is my go-to—just thin it with a splash of milk if it's too thick. The brown sugar adds that perfect autumnal depth, so don't skip it.
No white chocolate chips? Dark chocolate works too—just add a pinch of cinnamon to the melted chocolate for that apple-pie vibe. Short on pecans? Walnuts or almonds are great substitutes, though they'll have a different texture. The baking powder is non-negotiable here—it's what gives these little bites their perfect rise. If you're making these for a crowd, double the recipe—they disappear fast. And if you're worried about the apples browning, toss the diced pieces in a little lemon juice while you prep the rest.
Store the cake pops in an airtight container between layers of parchment paper to keep them fresh for up to 5 days. Freeze them for 3 months if you're making a big batch—they actually taste better after thawing. I like to portion them into individual boxes for gifts—just add a ribbon and you've got the perfect hostess treat. And if you're feeling fancy, dust them with powdered sugar right before serving. Trust me, it makes all the difference.
Why You'll Love This Recipe
- No Mixer Needed: I swear by this recipe when my stand mixer’s on strike—just cream the butter and sugars by hand, then fold in the flour. The cake’s tender crumb comes from that brown sugar, and honestly? The eggs bind it so well, you won’t believe it’s not from a box.
- Caramel-Kissed Magic: That combo of granulated and brown sugar? It’s what makes these pops dangerously good—they’re sweet but not cloying, with a subtle molasses depth. Drizzle them with melted butter after baking, and suddenly you’ve got a dessert that tastes like autumn in a bite.
- Party in a Box: These are my go-to for birthdays, potlucks, or even a last-minute teacher gift. The cake pops freeze like a dream (just thaw 10 minutes before serving), and kids love dipping them in melted chocolate or caramel. Zero stress, all crowd-pleasing.
- Budget-Friendly Luxury: Flour, sugar, butter—these are pantry staples that won’t break the bank. A single batch makes 24 pops, and leftovers? Toss them in the freezer for snack attacks later. I’ll be real: this recipe saved me $20 last month by replacing store-bought treats.
Step-by-step instructions for apple cake pops
These bite-sized treats combine tender cake with spiced apple filling for a magical dessert experience.
Mix Dry Ingredients for Perfect Texture
In a medium bowl, whisk together the 2.5 cups all-purpose flour, 1.5 cups granulated sugar, 0.5 cup packed brown sugar, 2 tsp baking powder, 0.5 tsp salt, 2 tsp ground cinnamon, and 0.5 tsp ground nutmeg. Sift the flour mixture through a fine-mesh sieve to eliminate lumps and aerate the batter for a lighter texture. This step is crucial—those tiny air pockets create the perfect crumb structure for cake pops.
Set the dry ingredients aside while you prepare the wet ingredients. The reason we sift here is that unsifted flour can make your cake pops dense rather than light and fluffy. I like to tap the sifter gently over the bowl to ensure even distribution of all the spices and baking powder.
Cream Butter and Sweeteners for Fluffy Cake
In a large mixing bowl, combine the 1 cup unsalted butter (at room temperature) with the 2 whole large eggs and 2 tsp vanilla extract. Using an electric mixer on medium speed, beat until the mixture is pale and fluffy, about 3-4 minutes. This creaming process incorporates air, which will help your cake pops rise beautifully.
Gradually add the dry ingredients to the wet mixture, mixing on low speed just until combined. Be careful not to overmix—the batter should be thick but still pourable. If it looks too dry, add the 0.5 cup milk gradually until you reach a smooth consistency. The batter should coat the back of a spoon but still hold its shape when dropped from a spoon.
Fold in Apple Filling and Pecans
Gently fold in the 1.5 cups caramelized apple filling using a spatula, being careful not to deflate the batter. The apple filling adds moisture and that signature apple flavor throughout each bite. Next, stir in the 0.5 cup crushed pecans to add a delightful crunch and nutty depth.
Here's the thing—don't overmix at this stage. You want to maintain those air pockets from the creaming process. If you see streaks of apple filling, that's okay. The cake will still be delicious, and the filling will distribute evenly as it bakes. Cover the bowl with plastic wrap and refrigerate for at least 30 minutes (or up to 24 hours) to allow the flavors to meld.
Bake the Cake Pops to Golden Perfection
Preheat your oven to 350°F. Line two 8-inch round cake pans with parchment paper and grease them lightly with butter. Divide the chilled batter evenly between the pans. Bake for 20-25 minutes, or until a toothpick inserted into the center comes out clean and the edges are golden brown.
I always check for doneness at the 20-minute mark because ovens vary. If the tops are browning too quickly, tent the pans with foil. Once baked, let the cakes cool in the pans for 10 minutes, then transfer to a wire rack to cool completely. The cakes should be moist but not wet, with a tender crumb that's perfect for shaping into pops.
Shape and Dip for Irresistible Finishes
Once completely cooled, crumble the cakes into fine crumbs using your hands. In a bowl, mix the crumbs with the 1 cup white chocolate chips until evenly coated. Roll the mixture into 1-inch balls (about 1 tablespoon each), then place them on a parchment-lined tray and freeze for 15 minutes to firm up.
Melt the remaining white chocolate chips in a microwave-safe bowl in 20-second intervals, stirring between each interval until smooth. Dip each frozen cake pop halfway into the melted chocolate, then sprinkle with additional crushed pecans while the chocolate is still wet. Place the dipped pops on a parchment-lined tray and let them set in the refrigerator for 10 minutes before serving.
Pro Tips For Making Apple Cake Pops
- COOL THE BATTER: Pour the cake batter into the pan just before baking—no waiting. Cold butter in the mix makes the cake dense, and room-temp batter spreads unevenly. Scoop it straight from the bowl into the pan while it’s still cool, then bake immediately. (Yes, even if your hands are sticky.)
- WEIGH THE FLOUR: Ditch the measuring cups for a kitchen scale—this recipe needs precision. Spooning flour into cups packs it too tightly, throwing off the ratio of sugar to flour. A quick 225g (about 1¾ cups) keeps the cake light and moist, not dry or gummy.
- DON’T OVERMIX: Stop folding in the apples as soon as they’re just coated—no more. Overmixing turns the batter into glue, and those chunks of apple will turn to mush instead of staying tender. Use a spatula to gently swirl them in, then let the oven do the work.
- CHILL THE POPS: Roll the cake pops in chocolate before they’ve fully cooled—when they’re still warm to the touch but not sticky. If you wait, the coating will crack or slide off. Work fast, then pop them in the fridge for 10 minutes to set properly. (Trust me, rushing this step ruins everything.)
Essential equipment for this dish
Must-Have Mixing Tools
Start with a medium mixing bowl for dry ingredients and a large mixing bowl for creaming butter and eggs—stainless steel or glass bowls work best for even heat distribution.
I swear by a KitchenAid stand mixer for creaming butter (it handles the job in 3-4 minutes without overworking), but a hand mixer works too if you're on a budget.
For folding in apples and pecans, grab a flexible silicone spatula—it won’t scratch your bowls and gets into every nook. 🥄
Baking Essentials
Two 8-inch round cake pans with parchment paper liners are non-negotiable—they prevent sticking and make cleanup a breeze. Preheat your oven to 350°F and use an oven thermometer (like the Thermoworks Oven Thermometer) to ensure accuracy—home ovens can run 25°F hotter or colder than set.
A toothpick is your best friend for testing doneness at the 20-minute mark.
Crumbling and Shaping
For crumbling cooled cake, I use clean hands—they’re the most effective tool for breaking it into fine, even crumbs. A small offset spatula helps transfer crumbs to your mixing bowl without making a mess.
For rolling pops, a cookie scoop (like the OXO Good Grips 1-tablespoon scoop) ensures uniform 1-inch balls. Freeze pops on a parchment-lined tray to prevent sticking during dipping. ✨
Dipping Station Setup
Melt white chocolate in a microwave-safe bowl (or a double boiler)—I use 20-second intervals to avoid scorching. A small silicone brush helps spread melted chocolate evenly when dipping. For toppings, a fine-mesh sieve over a bowl catches stray pecan dust while letting crushed nuts flow freely.
A cooling rack in the fridge speeds up setting time for 10 minutes of crisp perfection.
Storage Containers
Store finished pops in an airtight container with parchment paper layers between them to prevent sticking. I love Pyrex glass containers—they’re microwave-safe and stackable.
For gifting, clear plastic boxes with lids (like Sterilite) keep pops visible and fresh for 5 days at room temperature or 3 months in the freezer. Label them with the date—trust me, you’ll forget! 📅
Nutrition facts
Frequently asked questions
Can I make these without an oven?
Use a muffin tin with a water bath (place the tin in a larger pan with 1 inch of hot water) and bake at 350°F for 12-15 minutes instead. The steam helps create a tender crumb. For no-bake versions, try blending cake crumbs with melted white chocolate and shaping into pops—store in the fridge for 2 hours to set.
How do I prevent the cake pops from falling apart when dipping?
Chill the rolled pops in the freezer for 15 minutes before dipping—they’ll hold together better. Use room-temperature chocolate (not too runny) and work quickly to avoid melting. For extra stability, dip the pops in melted chocolate twice, letting each layer set for 5 minutes between coats.
What’s the best apple variety for this recipe?
Granny Smith apples work best for their tartness and firm texture, but Fuji or Honeycrisp also add natural sweetness. Avoid overly soft varieties like McIntosh, as they’ll turn mushy when baked. If using fresh apples, toss diced pieces in 1 tsp lemon juice to prevent browning while prepping the batter.
Can I make these gluten-free or vegan?
For gluten-free, swap the all-purpose flour for a 1:1 gluten-free baking blend (like Bob’s Red Mill) and add 1 extra tsp xanthan gum. For vegan, replace butter with 1 cup coconut oil, eggs with 2 flax eggs (2 tbsp ground flax + 6 tbsp water), and milk with almond milk. Use vegan white chocolate chips for dipping.
Why did my cake pops turn out dense?
Overmixing the batter or skipping the 30-minute chill before baking are common culprits. Sift your flour thoroughly and cream the butter until pale and fluffy. Also, ensure your oven is properly calibrated—many home ovens run 25°F hotter or colder than set. A toothpick test at 20 minutes helps avoid overbaking.