
Desserts
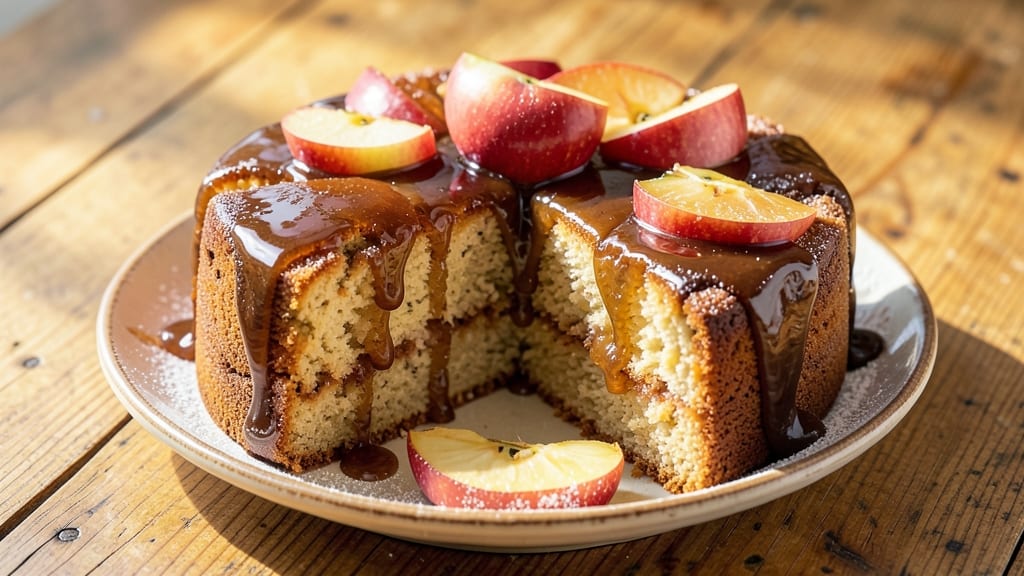
This apple cake recipe with caramel glaze brings autumn warmth to your kitchen with layers of spiced apples and a buttery drizzle that ties everything together. 🌟 Growing up in Nana Mae's Atlanta diner, I learned how the right balance of cinnamon, nutmeg, and tender apples transforms simple ingredients into something extraordinary.
The secret lies in baking the cake layers just slightly underdone so they stay moist, then brushing each with warm caramel glaze that sets perfectly between layers.
The recipe begins with a tender vanilla cake base infused with warm spices, then layers of thinly sliced apples that bake until tender but still hold their shape.
What makes this version special is the homemade caramel glaze—rich, smooth, and slightly grainy from brown sugar—that you'll brush between layers and drizzle over the top. This isn't just dessert; it's a celebration of seasonal flavors that tastes like home.
By the time you're done, you'll have a cake with golden layers, perfectly caramelized apples peeking through, and a glossy glaze that makes every bite feel like a hug. The aroma alone will have everyone gathering around your table.
Whether you're serving it at a holiday gathering or simply treating yourself, this recipe delivers restaurant-quality results with a touch of Southern charm.
Ready in about 2 hours (including cooling time), this cake keeps beautifully for 3 days covered at room temperature or freezes perfectly for up to 3 months. The glaze can be made ahead too—just reheat gently before using. Let's bake this apple cake together!
Ingredients for apple cake recipe with caramel glaze
Simple pantry staples plus a few seasonal apples create this showstopping apple cake with caramel glaze.
| Ingredient | Amount | Notes |
|---|---|---|
| All-Purpose Flour 🌾 | 2 ½ cups | Sifted for light texture |
| Granulated Sugar 🍚 | 1 ½ cups | White or light brown |
| Light Brown Sugar 🍚 | ½ cup | Packed firmly |
| Unsalted Butter 🧈 | 1 cup | Room temperature, full-fat |
| Large Eggs 🥚 | 2 whole | Room temperature |
| Vanilla Extract 🌿 | 1 tbsp | Pure extract preferred |
| Ground Cinnamon 🌶️ | 2 tsp | Freshly ground preferred |
| Ground Nutmeg 🌿 | ½ tsp | Freshly grated nutmeg |
| Baking Powder 🧂 | 2 tsp | Aluminum-free preferred |
| Salt 🧂 | ½ tsp | Fine sea salt |
| Apples 🍎 | 3 medium | Honeycrisp or Granny Smith |
| Unsalted Butter 🧈 | ½ cup | For caramel glaze |
| Light Corn Syrup 🍯 | ¼ cup | Or honey for variation |
| Packed Brown Sugar 🍚 | 1 cup | For caramel glaze |
| Heavy Cream 🥛 | ½ cup | Full-fat for richness |
The apples are non-negotiable here—Honeycrisp or Granny Smith hold their shape beautifully. Local farmers markets often have the best selection this time of year, but the grocery store works too. Look for firm, unblemished apples—they'll caramelize perfectly. For the cake, Bob's Red Mill flour or your regular all-purpose works, but sift it well to avoid dense layers. The butter should be room temperature—press it, if it leaves an indent, it's ready. I always grab the Land O'Lakes unsalted butter from the freezer section—it's consistently high quality.
No vanilla extract? Vanilla bean paste or even vanilla sugar works in a pinch. Short on brown sugar? Substitute white sugar plus 1 tsp molasses for that caramel depth. The caramel glaze is where the magic happens—Trader Joe's corn syrup is my go-to for its smooth texture, but any light corn syrup does the trick. For extra richness, swap the heavy cream for half-and-half. The apples? Peel and slice them 1/4-inch thick—any thicker and they'll stay crunchy. Toss them with a pinch of cinnamon before baking for extra warmth.
This cake keeps beautifully for 3 days covered at room temperature, but honestly it's best eaten within 2 days when the glaze is still glossy. For longer storage, freeze the unfrosted cake layers for up to 3 months—just thaw overnight before glazing. The caramel glaze can be made 1 week ahead and reheated gently. I always make a double batch—one for the cake, one to drizzle over ice cream. Trust me, you'll want it.
Why You'll Love This Recipe
- No Mixer Needed: I swear by this recipe when my mixer’s on the fritz—just cream that butter and brown sugar by hand until it’s light and fluffy. The eggs bind everything together so well, you won’t even miss the electric beat.
- Caramel Magic: That glaze? It’s the star. The warm brown sugar and butter blend into a glossy, buttery finish that clings to every crumb, turning a simple cake into something that tastes like a bakery’s secret. Honestly, I’ll take this over fussy decorating any day.
- Weeknight Hero: Slice it for breakfast, pack it for lunch, or serve it at a potluck—this cake keeps its shape and flavor for days. Between us, I’ve reheated slices in the microwave for three mornings in a row, and no one’s complained. (Yes, even on a Tuesday night.)
- Pantry Staple Power: Flour, sugar, butter, eggs—these are ingredients you already own. No specialty items, no last-minute grocery runs. I’ve made this with apples from the fridge or the farmers’ market, and it’s always a win. Budget-friendly? Absolutely. Reliable? Even more so.
Step-by-step instructions for apple cake with caramel glaze
Here's how to create layers of warm spiced apples and rich caramel drizzle that'll make your kitchen smell amazing.
👨🍳 Step 1: Prepare the Apples and Mix Dry Ingredients
Core and peel the 3 medium apples, then slice them into ¼-inch thick wedges. Toss them with 1 teaspoon of the ground cinnamon and set aside. In a medium bowl, whisk together the 2.5 cups all-purpose flour, 2 teaspoons baking powder, ½ teaspoon salt, 2 teaspoons ground cinnamon, and ½ teaspoon ground nutmeg. Sifting isn't required here, but give it a quick stir to combine everything evenly.
This pre-mixing ensures your cake will rise properly and have that perfect spiced flavor throughout. The cinnamon-nutmeg combo is what gives this cake its signature warmth. I like to use Honeycrisp or Granny Smith apples—they hold their shape beautifully during baking and add just the right balance of sweet and tart.
🍳 Step 2: Cream Butter and Sugars
In a large mixing bowl, beat the 1 cup unsalted butter and both sugars (1.5 cups granulated sugar and ½ cup light brown sugar) on medium speed with a hand mixer for 3-4 minutes. You'll know it's ready when the mixture is light and fluffy, with ribbons forming when the beaters are lifted. This step is crucial for creating that tender, moist cake texture.
Here's the thing—I always let my butter sit at room temperature for about 1 hour before starting. It should be soft enough to leave a slight indent when pressed, but not melted. If your butter is too cold, the cake will be dense. If it's too warm, you'll end up with a greasy mess. The perfect room-temperature butter creates that ideal airy consistency.
🥘 Step 3: Combine Wet Ingredients and Fold in Apples
Add the 2 whole large eggs, one at a time, mixing well after each addition. Then stir in the 1 tablespoon vanilla extract. With the mixer on low speed, gradually add about one-third of the dry ingredients to the wet mixture, mixing just until combined. Then fold in the prepared apples using a spatula, being gentle to avoid crushing them.
After adding the apples, finish incorporating the remaining dry ingredients. Mix just until everything is combined—overmixing develops gluten and makes the cake tough. The apples should be evenly distributed throughout the batter. If you notice the batter is too thick, you can add 1-2 tablespoons of milk or water to loosen it slightly, but don't add too much or your cake will be dense.
🔥 Step 4: Bake in Layers for Perfect Texture
Preheat your oven to 350°F. Grease two 9-inch round cake pans and line the bottoms with parchment paper. Divide the batter evenly between the pans and spread it out smoothly. Bake for 25-30 minutes, or until a toothpick inserted into the center comes out clean. Rotate the pans halfway through baking for even browning.
Here's where it gets fun—the cake should be golden on top with a slightly domed center. Don't overbake or you'll end up with dry cake. Let the cakes cool in the pans for 10 minutes, then transfer them to a wire rack to cool completely. While they're cooling, make the caramel glaze so it's ready when the cakes are done.
🍯 Step 5: Make the Caramel Glaze and Assemble
In a small saucepan, combine the ½ cup unsalted butter, ½ cup heavy cream, 1 cup packed brown sugar, and ¼ cup light corn syrup. Bring to a gentle boil over medium heat, stirring constantly. Once boiling, reduce heat to low and let it simmer for 3-4 minutes until slightly thickened. Remove from heat and let it cool for 5 minutes.
Place one cake layer on a serving plate and spread about ⅓ of the caramel glaze over the top. Add the second cake layer and spread the remaining glaze over the top and sides. The glaze should be warm but not hot when you assemble the cake—this helps it set properly. Let the cake sit for 10 minutes before slicing to allow the glaze to firm up slightly. The result should be warm, spiced apple layers with that perfect buttery caramel drizzle.
Pro Tips For Making Apple Cake Recipe With Caramel Glaze
- Cream Butter Properly: Don’t just mix it—work that butter until it’s pale and fluffy with the sugars, about 3-4 minutes with a hand mixer. I used to skip this, and the cake turned out dense and greasy. The butter needs to fully emulsify with the sugars to create that tender crumb.
- Use Cold Apples: Slice your apples right before folding them into the batter and keep them in the fridge until you’re ready to mix. Cold apples release less moisture, which keeps the cake from getting soggy while baking. (Yes, even if you’re impatient like me.)
- Check Doneness Early: Pull the cake out of the oven when the center still has a slight bounce—it’ll firm up as it cools. I learned this the hard way by overbaking and ending up with a dry, crumbly mess. A toothpick should come out with a few moist crumbs, not wet batter.
- Simmer Caramel Slow: Reduce the heat to medium-low when making the glaze and stir constantly—it’s easy to burn it if you walk away. My grandmother swore by this, and she was right: a smooth, amber glaze tastes way better than a burnt one. (And yes, it’s worth the wait.)
Essential equipment for this recipe
Mixing Essentials
You'll need a stand mixer with paddle attachment for the creaming step—my KitchenAid Artisan Series handles this perfectly, but a hand mixer works too. For the apples, a sharp chef's knife and mandoline slicer (like the OXO Good Grips) make quick work of even slices.
I've tried the hand-slicing method, but the mandoline saves time and ensures consistency. 🍎
Baking Tools
Two 9-inch round cake pans with removable bottoms are ideal—I swear by Wilton Perfect Results pans for even baking. Line them with parchment paper to prevent sticking, and
Caramel Glaze Setup
The glaze requires a small saucepan with a heatproof handle—I prefer All-Clad Stainless Steel for even heating. A spatula helps spread the glaze evenly between layers, and a pastry brush (like West Bend Silicone) works great for brushing excess glaze on the sides. For assembly, use a round cake stand to elevate your masterpiece—my Wilton Cake Stand is sturdy and stylish.
Optional Upgrades
For extra precision, a digital kitchen scale (like OXO Good Grips) ensures accurate measurements—especially important for the caramel glaze where ratios matter. A thermometer helps monitor the glaze's temperature (aim for 230°F before cooling).
And if you're feeling fancy, a cake leveler (like Wilton Cake Leveler) creates perfectly flat layers for professional results. 💫
Nutrition facts
Frequently asked questions
Can I use different types of apples for this cake?
While Honeycrisp or Granny Smith work best, you can experiment with Braeburn, Fuji, or Pink Lady apples. Tart varieties hold their shape better, but sweeter apples like Gala will caramelize more quickly. Just slice them ¼-inch thick and toss with cinnamon before baking.
How do I store this cake if I make it ahead?
The cake keeps beautifully for 3 days at room temperature, covered loosely with plastic wrap. For longer storage, freeze the unfrosted layers for up to 3 months—thaw overnight before glazing. The caramel glaze can be made 1 week ahead and reheated gently before using. Refrigerate glazed cake for up to 5 days if needed.
Can I make this cake in a convection oven?
Yes, but reduce the baking time by 2-3 minutes—convection ovens cook faster. Monitor closely after 22 minutes to avoid overbaking. Also, preheat your convection oven to 325°F instead of 350°F for even results. The glaze won't be affected by the convection setting.
What's the best way to make the caramel glaze extra shiny?
For a glossier finish, add 1 teaspoon lemon juice to the glaze mixture while heating—it helps emulsify the sugars. Also, brush the glaze on when it's warm but not hot (around 180°F) for maximum shine. Chill the assembled cake in the fridge for 30 minutes before serving to set the glaze perfectly.
Can I substitute corn syrup in the glaze?
Yes! Use honey or maple syrup in equal amounts, but reduce the liquid slightly (¼ cup instead of ¼ cup + 2 tbsp) since these are thicker. For a richer flavor, add ½ teaspoon vanilla extract to the glaze. The texture will be slightly thicker but still delicious.