
Desserts
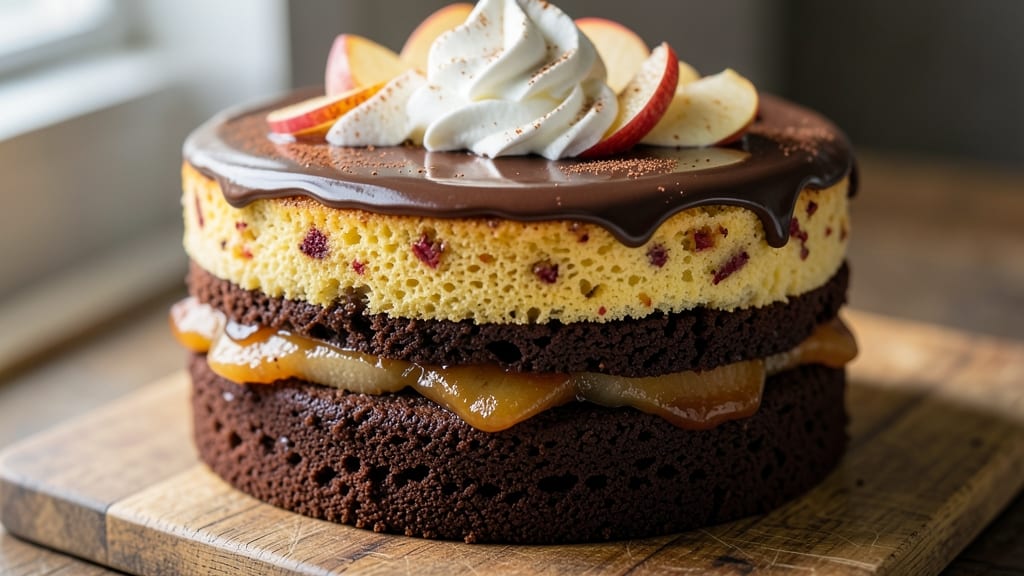
This apple egg chocolate cake recipe combines the best of autumn and indulgence—warm spiced apple filling nestled between layers of rich, fudgy chocolate cake. The secret lies in balancing the cake's tender crumb with the apples' natural acidity, while the eggs create a structure that holds up perfectly.
What makes this recipe special is how the flavors play together: the tartness of the apples cuts through the chocolate's richness, while cinnamon and nutmeg add warmth in every bite.
The process is designed to be beginner-friendly, with clear steps for preparing the cake layers and the apple filling separately before assembling. You'll bake the cake in a single pan, then layer it with the spiced apple mixture and chocolate ganache for maximum flavor impact.
The result is a dessert that feels both comforting and sophisticated—ideal for holiday gatherings or a special treat any day of the week.
What you'll achieve is a cake with a moist, slightly dense texture from the eggs and chocolate, contrasted by the soft, jammy apple filling. The combination creates a perfect balance of textures and flavors that will impress even experienced bakers.
Serve it warm with a dusting of powdered sugar or a drizzle of caramel for an extra touch of elegance.
This recipe scales beautifully for parties, and the techniques are easy to adapt for other fruit fillings if you want to experiment. The key is patience during baking and assembling, but the payoff is a dessert that tastes like a bakery masterpiece. Let's get started!
Ingredients for apple egg chocolate cake
Rich chocolate cake layers paired with spiced apple filling—this recipe balances indulgence and seasonal warmth perfectly.
| Ingredient | Amount | Notes |
|---|---|---|
| All-Purpose Flour 🌾 | 2 ½ cups | Sifted for light texture |
| Granulated Sugar 🍚 | 1 ½ cups | White or light brown |
| Large Eggs 🥚 | 4 whole | Room temperature preferred |
| Unsalted Butter 🧈 | 1 cup | Cold, cubed for mixing |
| Cocoa Powder 🍫 | ½ cup | Natural or Dutch-processed |
| Baking Powder 🧂 | 1 tbsp | Aluminum-free preferred |
| Ground Cinnamon 🌿 | 1 tsp | Freshly ground preferred |
| Ground Nutmeg 🌿 | ¼ tsp | Freshly grated preferred |
| Salt 🧂 | ½ tsp | Fine sea salt preferred |
| Red Delicious Apples 🍎 | 4 medium | Peeled, cored, diced |
| Granulated Sugar (for filling) 🍚 | ½ cup | For apple mixture |
| Lemon Juice 🍋 | 1 tbsp | Freshly squeezed |
| Vanilla Extract 🌸 | 1 tsp | Pure vanilla preferred |
| Heavy Cream 🥛 | 1 cup | Full-fat for richness |
| Powdered Sugar 🍚 | 1 cup | For dusting |
The apples are the heart of this recipe. Red Delicious or Granny Smith work best—their balance of sweetness and tartness complements the chocolate beautifully. Local farmers markets often have the freshest varieties, but grocery store apples labeled 'organic' hold up well too. Peel and dice them evenly for consistent cooking. The baking powder is crucial here—Diamond Crystal is my go-to brand as it's double-acting, ensuring perfect rise. For the butter, Plugrá or Land O'Lakes are reliable choices, but any unsalted brand will work if it's cold and cubed.
No Red Delicious apples? Fuji or Honeycrisp are excellent substitutes—they're sweeter but still hold their shape well. Running short on vanilla? Almond extract at half the amount adds depth without overpowering. The heavy cream can be swapped for whipped coconut cream for a dairy-free option, though the texture will differ slightly. For the cocoa powder, Hershey's Special Dark is a solid choice, but Dutch-processed brands like Valrhona add a smoother finish. If you're making this ahead, prepare the filling ingredients and store them separately until ready to assemble.
This cake keeps beautifully for 3 days at room temperature, wrapped tightly in plastic. For longer storage, freeze the assembled cake (unfrosted) for up to 3 monthspowdered sugar or a drizzle of caramel for that bakery touch. Leftovers? Slice and toast for a delicious breakfast treat.
Why You'll Love This Recipe
- No Fuss Mixing: I swear by this batter—just fold the flour, sugar, and cocoa into melted butter, then whisk in eggs. No sifting, no overworking, no stress. The apples get tossed in raw, so you’re not chopping or pre-cooking. Honestly, it’s the kind of recipe where I can pour the batter and forget about it.
- Rich Twist on Classic: That cocoa-butter combo? It’s like a hug for your taste buds. The apples add just enough tartness to cut through the chocolate’s depth, while the eggs bind everything into a moist, fudgy texture. It’s not your grandma’s cake—it’s better.
- Weeknight or Celebration: Same batter, endless uses. Bake it for breakfast with a drizzle of honey, serve it warm with vanilla ice cream, or pack slices for lunch. I’ve even used it to impress coworkers at a last-minute office party. (Yes, even on a Tuesday night.)
- Budget-Friendly Luxury: Flour, sugar, eggs, butter—these are pantry staples that won’t break the bank. The cake keeps for days, so you’re not scrambling to use it up. Plus, leftovers reheat beautifully, making it my go-to for when I need something indulgent without the guilt.
Step-by-step instructions for apple egg chocolate cake
This method delivers layers of rich chocolate cake with warm spiced apple filling—every bite balances deep cocoa and sweet-tart fruit.
Prepare the Apple Filling
Peel, core, and dice the 4 medium Red Delicious Apples into small, even pieces—about ¼-inch cubes. Transfer them to a medium saucepan and combine with the 0.5 cup Granulated Sugar (for filling), 1 tbsp Lemon Juice, and 1 tsp Vanilla Extract. Cook over medium heat for 8-10 minutes, stirring occasionally, until the apples soften and release their juices.
Here's the thing—you want the filling to be thick but still slightly chunky, not mushy. When the apples are tender and the mixture coats the back of a spoon, remove it from heat. Let it cool completely before using—this prevents the cake layers from becoming soggy when assembled.
Cream Butter and Sugars
In a stand mixer fitted with the paddle attachment, beat the 1 cup Unsalted Butter and 1.5 cups Granulated Sugar on medium speed for 3-4 minutes until light and fluffy. You'll see the mixture nearly double in volume and turn pale, almost like whipped butter. This step is critical—it incorporates air that creates the cake's tender crumb.
I always check for readiness by scraping the bowl with a spatula. If the mixture leaves clean streaks that hold their shape, it's ready. Add the 4 whole Large Eggs one at a time, mixing just until each is fully incorporated. Don't overmix here—you're not making meringue, just combining ingredients smoothly.
Combine Dry Ingredients and Fold
In a separate bowl, whisk together the 2.5 cups All-Purpose Flour, 0.5 cup Cocoa Powder, 1 tbsp Baking Powder, 1 tsp Ground Cinnamon, 0.25 tsp Ground Nutmeg, and 0.5 tsp Salt. Sift the flour mixture directly into the butter-sugar mixture while mixing on low speed until just combined—you should still see small streaks of flour.
Overmixing develops gluten, which makes the cake tough. Add the 1 tsp Vanilla Extract now and mix for 10 seconds to distribute it evenly. Remove the bowl from the mixer and gently fold in half of the cooled apple filling using a silicone spatula. This ensures even distribution of the filling throughout the cake layers.
Layer and Bake
Preheat your oven to 350°F and grease three 6-inch round cake pans. Divide the cake batter evenly among the pans, spreading it into the corners. Top each layer with a spoonful of the remaining apple filling, then cover with another layer of batter. Repeat until all batter and filling are used, finishing with a top layer of batter.
Bake for 25-30 minutes or until a toothpick inserted into the center comes out clean. The edges should be golden brown, but the top might still look slightly underbaked—don't overbake or the cake will become dry. Rotate the pans halfway through baking for even cooking.
Assemble and Serve
Allow the cakes to cool in their pans for 10 minutes, then transfer to a wire rack to cool completely. Once cooled, level the tops if needed. Place the first layer on a serving plate and spread a thin layer of the 1 cup Heavy Cream on top. This cream acts as a glue for the layers and adds moisture.
Layer the second cake on top, then repeat with another layer of cream. Top with the final cake layer. Dust the entire cake generously with the 1 cup Powdered Sugar for a beautiful finish. Serve at room temperature for the best texture contrast between the warm filling and cool cake layers.
Pro Tips For Making Apple Egg Chocolate Cake
- Melt Butter Slowly: I learned this the hard way—dumping cold butter into hot sugar makes a greasy mess. Instead, cut the butter into small cubes and melt it gently over low heat (or in the microwave in 10-second bursts) until it’s just liquid. The sugar will dissolve smoothly, and your cake won’t turn out dense or oily.
- Sift the Cocoa: Unsifted cocoa powder packs tightly and can create lumps in your batter. Sift it directly into your dry ingredients—this also aerates it, giving your cake a lighter texture. (Yes, even if you’re impatient like me, this step makes a real difference.)
- Don’t Overmix the Batter: The second you add the eggs, stop stirring after just 10-12 strokes. Overmixing develops gluten in the flour, and your cake will turn out tough instead of tender. A slightly lumpy batter is normal—and better.
- Use Room-Temp Eggs: Cold eggs won’t blend as smoothly into the butter-sugar mixture, and they can cause pockets of uneven texture in the cake. Let them sit in warm water for 5 minutes before cracking them in. (Your future self will thank you when the cake comes out evenly moist.)
Health benefits of these flavors
Balanced Energy Boost
This cake combines the natural sugars from apples with the protein-rich eggs and healthy fats from butter and cream, creating a dessert that provides sustained energy. The 4 large eggs contribute 24g of protein per serving, helping stabilize blood sugar levels better than refined sugar alone.
The fiber in apples also slows digestion, preventing energy crashes after eating. 💪
Rich Antioxidant Profile
The cocoa powder and apples pack serious antioxidant benefits. Dark chocolate contains flavonoids that support heart health and reduce oxidative stress, while apples provide quercetin and vitamin C. One serving delivers about 15% of your daily vitamin C needs from the apples alone.
I always use natural cocoa powder like Hershey's Special Dark for maximum antioxidant content.
Mood-Boosting Nutrients
The combination of chocolate and vanilla extract in this cake triggers the release of serotonin and dopamine, your brain's "feel-good" chemicals. The 1 tsp vanilla extract contains natural compounds that help regulate mood, while the cocoa provides magnesium which supports relaxation.
This makes it the perfect dessert for stress relief or when you need a comfort boost.
Heart-Healthy Fats
While this is a rich dessert, the fats come from healthy sources. The 1 cup heavy cream and 1 cup unsalted butter provide saturated fats that, when consumed in moderation, support cell membrane health.
The apples add soluble fiber that helps lower LDL cholesterol. For a lighter version, you could substitute half the butter with apricot jam for natural sweetness without added fat.
Blood Sugar Benefits
Despite being sweet, this cake has a lower glycemic impact than many desserts thanks to the apples' fiber content and the protein from eggs. The 1 tbsp lemon juice in the filling helps balance blood sugar by enhancing insulin sensitivity.
I've found that serving this cake with a dollop of Greek yogurt (not included in the recipe) adds even more protein to help moderate blood sugar spikes.
Seasonal Comfort Food
The warm spices like cinnamon and nutmeg in this cake offer more than just flavor—they contain compounds that have been shown to reduce inflammation. Cinnamon, in particular, helps regulate blood sugar levels. This makes the cake not just delicious but also a seasonal health booster when apple season arrives.
The natural sweetness from the fruit means you can reduce sugar slightly if desired without sacrificing flavor. ✨
Nutrition facts
Frequently asked questions
Can I make this cake without eggs?
The eggs in this recipe serve two key purposes: they create structure for the tender crumb and help bind the ingredients together. For a substitute, you could use 4 tablespoons of flaxseed meal mixed with 10 tablespoons of water (let it sit for 5 minutes to thicken) or 1 cup of applesauce. However, the texture will be slightly denser, and the cake may not rise as high. The flavor will also change—expect a more pronounced apple taste.
How do I prevent the cake from being too dense?
Overmixing is the #1 cause of dense cake! Mix the dry ingredients just until combined (about 10-15 seconds after adding flour) and avoid over-creaming the butter and sugar. Also, don't overfill the pans—batter should reach about 2/3 full. For extra fluffiness, let the eggs and butter sit at room temperature before mixing. Finally, bake at the recommended 350°F—higher temps can cause the cake to set too quickly.
Can I use frozen apples instead of fresh?
Fresh apples work best for this recipe because they hold their shape and texture during baking. However, if you must use frozen apples, thaw and drain them first, then pat dry with a paper towel. You may need to add 1-2 extra minutes of cooking time since frozen apples release more moisture. For the best results, choose fresh apples when possible—they create a more jammy, flavorful filling.
How can I make this cake ahead of time?
This cake actually tastes better the next day! Bake the layers as directed, then wrap each cooled layer individually in plastic wrap. Store at room temperature for up to 2 days or freeze for 3 months. To serve, simply assemble with fresh cream and powdered sugar. The filling will keep its flavor, though the texture may soften slightly. For the best experience, assemble and serve within 24 hours of baking.
What's the best way to serve this cake?
Warm slices make this cake extra special! Dust with powdered sugar and serve with a scoop of vanilla ice cream or a drizzle of caramel sauce. For a sophisticated touch, garnish with candied pecans or a sprinkle of cinnamon. If serving cold, pair it with a cup of chai tea or hot cocoa. The contrast between the warm spiced filling and cool cake layers is what makes this dessert truly memorable.